Sunday, June 9, 2013

Drinking for Charity!

This week was a long week at work full of learning that will help me become more proficient at my job :)  We had our National Sales Meeting in Atlanta this week which was nice because I didn't have to travel, but it was also a VERY important meeting because our owner from Germany was coming in town.  WIKA is a privately held company headquartered in Klingenberg so it's not often he pays us a visit!  I got the pleasure to speak to him a bit one night at dinner and I must say not too many people my age and in my position get that opportunity!  I even got the opportunity to do a presentation for him (at the time I'm not sure I was quite as excited to do it but I was MUCH more nervous) which I am very proud to say went very well!  Wednesday night at the sales training we went to the Gwinnett Braves Game with our whole sales team and customer service to mix and mingle!  We had a blast and it's always a pleasure to relax with the coworkers!

Braves!
:)
 The meeting ended Thursday evening so Friday was used to catch up with emails (somewhat) before enjoying another relaxing weekend in Atlanta! Friday evening was another game night and dinner cooking night!  Kellie Ann and I made lasagna from scratch (using her mom's recipe which I unfortunately don't have!)  and it turned out amazing!  This time we had a few more people over so there were 8 of us to play games following dinner!  It was a quite a low key night because we knew Saturday would be a long day!
Fish Bowl!
:)
 Saturday we had signed up to do a charity bar crawl for Camp Twin Lake during the day at the Virginia Highlands since one of Joe's good friends work there, Kristina.  After getting up in the morning and walking 7.5 miles we headed downtown to start the day!  Sunday was Tareq's birthday so it was going to be a full day of celebrating his birthday!  As you can see in the pictures below, there were different color teams and we were team orange!  Results are still to be determined but whatever team tweeted/instagramed the most with their appropriate hashtag won!  Below are some pictures of the fun filled event!
Team Orange!!!
First of 5 Bars :)
Love this picture :)
 After the bar crawl we headed to the Red Pepper for some dinner then went back to Reza's new place in the highlands to get ready for the evening!  We had a fun night out on the town and even got to see an ex-coworker on the job!  There was a damper put on the night when Reza's key's were lost and we had no way to get back into his apartment but it all worked out OK since Joe had his keys on him and we were able to simply drive home to his place and sleep in our own bed :)

True Love :)
Although it is blurry we were excited to see  Brandie so I had to post it!
 Sunday has been quite a relaxing day!  I went to church in the morning and the pool later on in the day.  We are about to head to my apartment to start packing to move me for the 5th home in just about 1 year so that we can say we did something productive!  Next week is a week from home for work so I am very much looking forward to catching up on emails and getting some good phone calls in to move some of my bigger opportunities to the next steps! Happy Week :)

Summertime = Ice Cream Sandwiches...from Scratch :)

Anyone who knows me knows that I LOVE ice cream.  I saw homemade ice cream sandwiches being made on the food network and I figure there was no better time to make my first attempt than now!  It was Tareq's birthday so I had a great excuse :)  I made two different kinds, chocolate peanut butter and cookie dough! Here we go!

Chocolate Chip Ice Cream Sandwiches (From Sallies Baking Addiction)

For Cookie
Ingredients
2 and 1/4 cup all-purpose flour
1 teaspoon baking soda
1 and 1/2 teaspoons cornstarch
1/2 teaspoon salt
3/4 cup (1.5 sticks) unsalted butter, melted
3/4 cup light brown sugar, loosely packed
1/2 cup granulated sugar
1 large egg + 1 egg yolk*
2 teaspoons vanilla extract
1 cup chocolate chips or chocolate chunks

Directions:
Toss together the flour, baking soda, cornstarch and salt in a large bowl. Set aside.  In a medium size bowl, whisk the melted butter, brown sugar, and white sugar together until no brown sugar lumps remain. Whisk in the egg, then the egg yolk. Finally, whisk in the vanilla. Pour the wet ingredients into the dry ingredients and mix together with a large spoon or rubber spatula. The dough will be very soft. Fold in the chocolate chips. They may not stick to the dough because of the melted butter, but do your best to have them evenly dispersed among the dough. Cover the dough and chill for 2 hours, or up to 3 days. Chilling is mandatory.

Take the dough out of the refrigerator and allow to slightly soften at room temperature for 10 minutes.  Preheat the oven to 325F degrees. Line two large baking sheets with parchment paper or silicone baking mats. Set aside. Roll the dough into balls, about 3 Tablespoons of dough each. The dough will be crumbly, but the warmth of your hands will allow the balls to stay intact. Roll the cookie dough balls to be taller rather than wide, to ensure the cookies will bake up to be thick. Put 8 balls of dough onto each cookie sheet. Press a few more chocolate chips/chunks on top of the dough balls for looks, if desired. Bake the cookies for 11-12 minutes. The cookies will look very soft and underbaked. Do not bake longer than 12 minutes. They will continue to bake on the cookie sheet. Allow to cool on the cookie sheet for 10 minutes before moving to a wire rack to cool completely.
Chocolate Chip Cookies
To Assemble:
Ingredients:
2 Cookies
Chocolate Chip Cookie Dough Ice Cream

Roll ice cream into a cylinder about the same diameter as the cookies (pictured below)  
Ice Cream Log formed  by Aluminum Foil
Cut into sections and combine with cookie on top and on bottom. Prepare ice cream sandwich by putting a frozen cookie on top and on bottom of ice cream then place back into freezer until ready to serve.
Chocolate Chip Cookie Sandwich
Peanut Butter Chocolate Ice Cream Sandwiches

For the cookie:
Chocolate Cookie Dough
1/2 cup (1 stick) unsalted butter, softened to room temperature
1/2 cup sugar
1/2 cup light brown sugar (or dark brown)
1 large egg
1 teaspoon vanilla extract
1 cup all-purpose flour
1/2 cup + 2 Tablespoons unsweetened cocoa powder
1 teaspoon baking soda
1/2 teaspoon salt
2 Tablespoons milk (almond, cow's, soy, or half-and-half)
1 cup dark chocolate chips (or semi-sweet or milk chocolate)

Peanut Butter Cookie Dough
1/2 cup (1 stick) unsalted butter, softened to room temperature
1/2 cup light brown sugar (or dark brown)
1/4 cup sugar
1 large egg
3/4 cup creamy peanut butter
1 teaspoon vanilla extract
1/2 teaspoon baking soda
1 and 1/4 cups all-purpose flour
1/4 teaspoon salt
1 cup dark chocolate chips (or semi-sweet or milk chocolate)

Directions:

Make the chocolate dough: Cream the butter and sugars together with a hand or stand mixer on medium speed until light and fluffy. Scrape down the sides and bottom as needed. Beat in the egg and vanilla until combined, scraping down the sides as needed. In a separate bowl, combine the flour, cocoa powder, baking soda, and salt. Slowly mix it into the wet ingredients. The dough will be very thick. With a spoon or rubber spatula, mix in the milk and then fold in the chocolate chips.

Make the peanut butter dough: Cream the butter and sugars together with a hand or stand mixer on medium speed until light and fluffy. Scrape down the sides and bottom as needed. Mix in the peanut butter, egg, and vanilla (in that order). Scrape down the sides as needed. Slowly mix in the baking soda and flour. Do not overmix. Fold in the chocolate chips.

Chill both doughs for at least 1-2 hours. 2 hours is preferred.  Preheat oven to 350F degrees. Line cookie sheet with silicone baking mat or parchment paper. Measure 2 Tablespoons of peanut butter cookie dough. Roll into a ball. Take 2 Tablespoons of chocolate cookie dough. Roll into a ball. Smoosh the two balls together and roll them into 1 large ball. Repeat for each cookie. The chocolate cookie dough will get onto your hands, so wash/wipe them after you roll each cookie. It is important the chocolate cookie dough is chilled or else it will be even more messy.
Bake the cookies for 11-12 minutes, not exceeding 13 minutes. The cookies will look very soft, puffy, and almost undone. Allow the cookies to cool on the cookie sheet and they will continue to "bake" and set up. As they cool, the cookies will firm up. Cookies remain fresh (and soft) for up to 10 days in an airtight container. For ice cream sandwiches freeze cookies!


Chocolate Peanut Butter Cookies
To Assemble:
Ingredients:
2 Cookies
Reese's Peanut butter ice cream with Reese's Chunks

Roll ice cream into a cylinder about the same diameter as the cookies (like pictured above in Chocolate Chip Cookie Ice Cream)  Cut into sections and combine with cookie on top and on bottom. Prepare ice cream sandwich by putting a frozen cookie on top and on bottom of ice cream then place back into freezer until ready to serve.

Reese's Ice Cream Sandwich

Sunday, June 2, 2013

A Weekend Filled with Relaxation and Friends

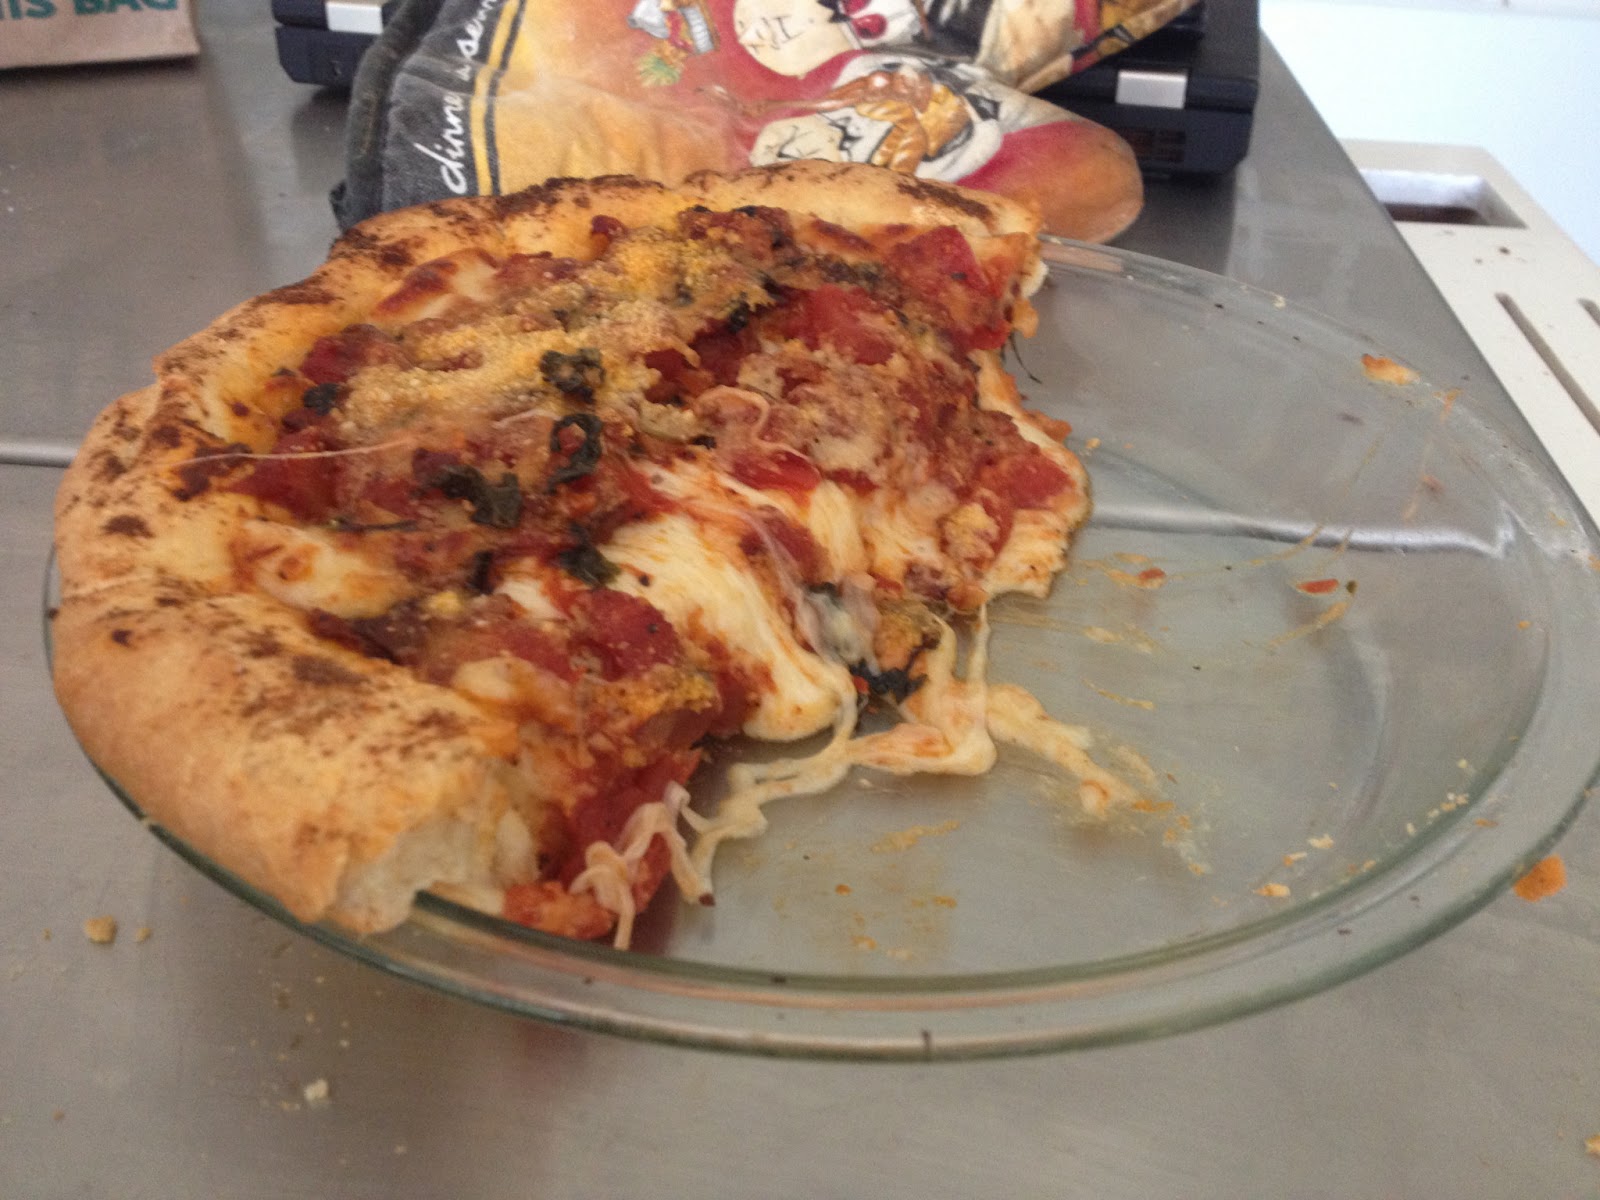
As the weekend comes to a close I start realizing this is one of the first weekends in a long time that Joe and I stayed in Atlanta all weekend and there wasn't a holiday or something to celebrate.  That being said, it was a VERY fun filled weekend!!!  The weekend started on Friday with a call from Joe that a house that we had loved was back on the market so we were going to go look at it once he got off of work.  Although it is at the top end of what we wanted to spend, it is very large and would provide a lot of room for us to grow into it.  The big plus is that it is move in ready so we would not have to put much work into it and it is very charming!  It has the charm of an older house but newly renovated :)  Before we headed downtown we had dinner, and man was it good.  Dinner on Friday was homemade Chicago deep dish pizza (One of the meals I miss the most from my short move to Chicago)!!!  I didn't know how it would turn out and if the dough would cook all the way through after just 25 minutes of baking.  Deep dish pizza also has a very distinct taste with the crust so I was excited to see if it would actually taste like Chicago Pizza!  I was surprised that the recipe from Seeded at the Table was spot on!!!

***disclaimer: this is not a quick meal***

Chicago Style Deep Dish Pizza

Ingredients:
For the dough:
1 1/2 cups + 2 tablespoons all
purpose flour
1/4 cup yellow cornmeal
3/4 teaspoon salt
1 teaspoon sugar
1 1/8 teaspoon instant yeast
1/2 cup + 2 tablespoons water, at room temperature
1 1/2 tablespoon unsalted butter, melted
1 teaspoon olive oil
2 tablespoons unsalted butter, softened

For the sauce:
1 tablespoon unsalted butter
2 tablespoons grated onion
Pinch of dried oregano
1/4 teaspoon salt
1 clove garlic, minced or pressed
1 (14.5 oz) can petite
diced tomatoes
Pinch of sugar
2 tablespoons chopped basil leaves
1 1/2 teaspoon olive oil
Ground black pepper, to taste
Salt, to taste
For assembling and topping:
2 tablespoons olive oil
8 ounces Mozzarella, shredded (about 2 cups)
1/4 ounce Parmesan cheese, grated (about 2 tablespoons)

Directions:
To make the dough:
Whisk together the flour, cornmeal, salt, sugar and yeast in the bowl of a stand mixer, until well blended. Attach the dough hook and mix in the water and melted butter on low speed for 1 to 2 minutes. Scrape the sides and bottom of the bowl as needed. Increase the speed to medium low and knead until the dough is glossy and smooth, about 3 to 4 minutes. Coat a medium bowl with 1 teaspoon of the olive oil. Transfer the dough to the
bowl, turning once to coat with oil. Cover tightly with plastic wrap and let rise at room temperature until nearly doubled, about 45 to 60 minutes. Once dough is risen, turn it out onto a dry work surface and roll into an 8 x 6 inch rectangle. To laminate the dough, spread the softened butter over the surface, leaving a 1/2 inch border around the edge. Starting at the short end, roll the dough into a tight cylinder. With the seam side down, flatten the cylinder into a 9 x 2 inch rectangle, then fold into thirds like a business letter. Pinch the seams to form a ball, and return to the oiled bowl. Cover tightly again with plastic wrap and let rise in the refrigerator for 40 to 50 minutes. (Mine did not double in size, but it rose to abouet size and a half.) 
Meanwhile, prepare the sauce: 
In a medium saucepan, melt the butter over medium heat. Stir in the onion, oregano and salt. Saute until the liquid has nearly evaporated and the onion is golden brown, stirring often, about 3 to 5 minutes. Add the garlic and cook just until fragrant, about 30 seconds. Stir in the tomatoes and sugar, then increase the heat to medium high. Bring the mixture just to a boil, then lower the heat to medium low and continue to simmer until reduced to about 1 1/4 cups, about 15 minutes. Remove from heat and stir in the basi l and oil. Season with salt and pepper to taste.
Assemble and top the pizza:
Preheat oven to 425 ̊F. Coat a 9 inch round cake pan with olive oil. Move the dough to a dry work surface and roll out into a 13 inch disk about 1/4 inch thick. Carefully transfer the dough to the pan and lightly press to line the bottom of the pan and 1 inch up the sides. If the dough resists stretching, wait 5 minutes before trying again.  Sprinkle the shredded Mozzarella over the surface of the dough, then layer the sauce over the cheese. Top with Parmesan and bake for 20 to 25 minutes, until crust is golden brown. Let rest for 10 minutes before slicing.

Hope you enjoy dinner because we sure did and the leftovers were great as well!  We drove downtown after dinner and looked at the house and it was just as cute as it was in pictures!  We both loved it, but since Joe works in the housing market, it was up to him to decide of we wanted to offer on the house and what we would offer.  After the house tour we went to see one of our friend's new apartments then met up with others for drinks/dinner at Taco Mac for a couple hours.  It is always a pleasure seeing Reza and Kellie Ann and Joe's roommate and girlfriend.

The next morning, after sleeping on it and doing a lot of research, Joe decided it was time to put our first offer on a house!!! I figured I would document the moment, just for fun :)  We still don't know if we got the house or not but hey either way we made a move on a home!


After that it was time to get ready and go dress shopping :) :) :) I was beyond lucky to have one of my best friends come in town all the way from Virginia Tech for the experience (LOVE YOU BETH!!!).  Bethany, Rialda, and my future mother in law were ready to go at 11 AM!

Backtrack to Thursday, during my lunch break I had gone to a beautiful bridal store, Carrie's Bridal located in Chamblee.  I didn't know what to expect but Carrie is the designer, owner, and bridal consultant at the store. It is one of the best bridal experiences you can have, and every dress is under $1000!!!! If you have every gone wedding gown shopping you know that is a steal of a deal!  She makes sure that you are the only appointment for the hour and a half block and you have her undivided attention!  She is such a pleasure to talk to and really listens to what you have to say about each dress.  After trying on quite a few dresses and loving 3 of them, Carrie suggested I try them on back to back. After I tried on the first one again, I knew it was the one!  The other two just didn't look nearly as good as the first one.  That being said, I still couldn't commit after I had thought the dress in Greenville was the dress just a couple days earlier! So, I set an appointment for the same store Saturday afternoon, after I went to one more bridal shop.

So, with that, at 11 AM on Saturday, the four of us hit the road and headed to Bride Beautiful.  There, we picked out a couple dresses to try on and the process started all over again.  After a couple dresses I was enlightened!!! Although all of the dresses were beautiful, they simply could not add up to the dress from Carrie's and I could not get that dress off my mind.  With that, I called Carrie's and asked if I could come in before 4:30 because I knew that was the dress I wanted!  Although she was booked for the day, she managed to squeeze me in!  I tried on the dress for everyone and they instantly said it was "very Vida" so with that confirmation, I bough the dress!!! I don't want to go into too many details about the dress but the most amazing part was that not only did I get to take the dress home with me that day, it fits like a glove!  It literally looks like it was made for me and no alterations are needed (also saving a lot of money)!!!! I cannot wait until the day comes that I get to wear it to walk down the aisle, and I was incredibly sad to give it up to Joe's mom so that Joe had no chance to accidentally find it somewhere.  With that one more decision was made for the wedding!!!

Love these girls!
After dress shopping we headed home for a late lunch then went to hang out by the pool since it was such a beautiful day!  After relaxation Beth and I came home and took Rox on a walk then awaited the arrival for Reza, Kellie Ann, and Tareq so that we could go grocery shopping for our dinner/game night!  It was decided that we would make fajitas so the girls headed out to the grocery store to buy food!  Not only did we make steak and chicken fajitas, but there was chocolate peanut butter rice crispies, baked beans, guacamole, quesso, apricot and bree wrapped croissant, chips and salsa, and Mexican rice!  It was a lovely evening filled with games and way too much food, but it's always a great time hanging out with friends! 

Photo Bomb!!!
The Girls :)
Sunday morning Beth and I were the first ones up so we took Rox for another walk then made Chocolate Chip Pancakes for everyone!!  Now we are laying out by the pool enjoying the day before heading up to my apartment for a girls evening :) To say the least, it was a lovely weekend and much needed before the craziness of next week begins!  Wish us luck on the housing offer we placed and until next week (post National Sales Meeting)  have a lovely day/week!

Thursday, May 30, 2013

Risotto made with Quinoa!!!

Today was a very different meal from anything else I have ever made but I recently made Quinoa cakes and they were amazing so I wanted to try another Quinoa recipe.  We tend to have seafood once a week so this was going to be our seafood meal.  It is a fairly time consuming meal to make and there is always something to do while one thing is cooking but I had a blast making it and it is well worth the effort!  Quinoa is one of the newest "superfoods" out there so I have tried to play around with it some since I love the taste!  It is definitely not for everyone but I would always say try everything once!  This recipe is from Closet Cooking and instead of using whole artichoke I used whole canned artichoke to make my life easier.  Just make sure to drain all of the water out and you don't have to saute them separate from the garlic since they are already softer from being in water.

Baby Artichoke Heart Quinoa Risotto with Shrimp and Meyer Lemon Pesto
Ingredients:
1 tablespoon oil
1/2 pound shrimp (shelled and deviened)
1/2 cup white wine
1 batch quinoa risotto (see below)
1 batch meyer lemon pesto (see below)
Directions:
1. Heat the oil in a pan.
2. Add the shrimp and saute until cooked, about 2-3 minutes per side and set aside.
3. Add the white wine, deglaze the pan and mix the wine into the risotto.
4. Serve the risotto with shrimp and meyer lemon pesto.
Baby Artichoke Heart Quinoa Risotto
Ingredients:
8 baby artichoke hearts (stems trimmed)
1 tablespoon olive oil
1 onion (diced)
2 cloves garlic (chopped)
1 cup quinoa
1/2 cup white wine
3 cups chicken broth (or vegetable)
1/2 cup parmigiano reggiano (grated)
1 tablespoon butter
salt and pepper to taste
Directions:
1. Peel the leaves from the artichokes until you get to the paler tender inner leaves. Cut the top third off and discard and cut the artichoke in half. (Tip coat the artichoke hearts in lemon juice to prevent discolouration.)
2. Heat the oil in a pan.
3. Add the artichoke hearts and saute until tender, about 6-8 minutes.
4. Add the onion and saute until tender, about 5-7 minutes.
5. Add the garlic and saute until fragrant, about 1 minute.
6. Add the quinoa and stir to coat with the oil.
7. Add the wine, deglaze the pan and stir while simmering until it is gone.
8. Add 1/2 cup of the stock at a time and stir while simmering until it is gone. Continue until the quinoa is tender.
9. Add the parmigiano reggiano and butter and stir to help it melt in.
Meyer Lemon Pesto
Ingredients:
1 meyer lemon (cut into pieces and seeded)
1/2 cup basil (packed)
1 clove garlic
2 tablespoons pine nuts (toasted)
1/4 cup parmigiano reggiano (grated)
3 tablespoons olive oil
salt and pepper to taste
Directions:
Place everything into a food processor and blend.
Even looks pretty on a plate!
Hope you enjoy!!!

A Twist on Chicken Parm...

Last night was quite an amazing dinner.  It's always easy to get use to making the same thing over and over again and Joe and I always love Chicken Parm.  That being said,  I found a recipe on Cuisine Paradise that had a slight twist to it and it included avocados!  Since that is one of my new obsessions I knew we had to try it and it was amazing!  It is very healthy because you never even have to fry anything but the baked chicken turned out surprisingly crispy!  Enjoy :)

Ingredients:
2 Chicken Breast Fillets, halved lengthways
1/2 Cup Plain Flour
2 Tablespoons Fresh Milk
2 Eggs
1 1/2 Cups Dried Breadcrumbs
2 Tablespoons Olive Oil/Cooking Spray
1/2 Cup Tomato Pasta Sauce
2 avocados, Sliced
1/2 Cup Grated Mozzarella Cheese
Salad Green, to serve


Directions:
1. Place chicken breast in a clear plastic bag(alternatively between 2 sheets plastic wrap), using a rolling pin or meat mallet pound until 0.5cm thick.
2. Place flour and breadcrumbs on two separate plate and lightly whisk milk and egg together in a shallow bowl.
3. Coat 1 piece of chicken breast in flour(shaking off excess), dip in egg mixture then coat in breadcrumbs using your fingertips pressing on to secure.
4. Place on prepared baking tray lay with foil or baking paper, repeat the same process with the remaining chicken breast with flour, egg and etc.
5. Lightly spray or brush the prepared chicken with oil, bake for 8 minutes(turning after 4 minutes to have evenly colours on the breadcrumbs) in preheated 200 degree Celsius(392°Fahrenheit) fan-forced oven.
6. Remove from oven and spread each chicken breast with 1 heaped tablespoon of pasta sauce. Arrange avocado slices over sauce and sprinkle with decent amount of mozzarella cheese.
7. Return to oven and bake for another 5 - 7 minutes or until golden and chicken is cooked through.
8. Serve with either garden salad or use it as a main topping on cooked pasta.
Avocado Chicken Parm

We ate it with a side salad and it was absolutely amazing!  Hope ya'll enjoy as much as we did!


Wednesday, May 29, 2013

Quick and Easy Summer Meal

Last night I had to wait on the groceries to arrive before I could start cooking dinner.  Due to that, I wanted to make sure that I cooked a quick and easy meal so that I was not starving!  I had never tried this before but it was another pinterest idea so I knew it had to be good!  Below is what we did-

Ingredients:
3 Italian Sausages
1 Zucchini
2 Red Peppers
2 Yellow Peppers
1/2 Onion

Directions:

Dice up all of the above ingredients.  Seal in an aluminum foil pouch and grill (about 15 minutes) until sausage is done.  Enjoy! How easy and quick is that!!!!