Showing posts with label diy. Show all posts

Sunday, November 9, 2014

Burlap Wreath DIY

I made a wreath in the summer (which I will post later), but recently I wanted to make a more fall wreath for our door.   Burlap gives such a fall feeling, so I set out to find a webpage that helped me make a DIY wreath.  It is actually quite simple and the whole project can be completed within an hour.  Michael's is normally my go to store since they are just down the street and always have coupons, but I bought my colored burlap off Amazon.  You don't need much, so I will start with a shopping list.  Below is what you will need for your wreath.

  • 2 x 10 yard rolls of burlap (4 or 5 inches wide, I used 4)
  • Wire wreath base - I used a 18"
  • Wire or twine used to fasten burlap to base
  • Decore as desired (below is what I used)
    • 5 yds Orange Burlap (4" wide)
    • 2 fall colored flour bunches
    • Wooden Initial (8")
    • White Paint 
    • Paint Brush
    • Hot Glue
Now that you have everything you need, I will start by showing the links I used to better understand how to make the base of the wreath. Depending on how tight you wind the burlap, you may need 1 or 2 of the 10 yd rolls.  I used about 1 1/2 but mine were pretty close together.

YouTube Video
Written Instructions

Between these two videos, I thought I had it under control.  I was worried about messing it up, but there really is no way to mess it up!  Some loops can be a bit bigger, some can be a bit smaller, in the end it balances out.  I also had a random pattern when doing the wreath so that it did not get too structured.  No joke, you can do it however you would like and it turns out great!

After the wreath was complete, I took white paint and panted the wooden initial.  I wanted it to stand out so I just painted it with a simple acrylic paint.  While the letter was drying, I made a bow.  I had made several bows in the past year for various projects, so you really can Google bow making and find one to your taste. I made a bow similar to the below.

How to Make a Bow

Once that was set, I cut the flowers off of the bushels I had bought.  I chose red, yellow, orange, and white as the base of this wreath to make it very festive for fall.  Now that everything was ready to decorate, it was time to fasten.

Using a fastening wire, attach the bow and flowers to the completed burlap wreath.  The letter is a bit harder to attach, so I went ahead and just glued the letter to the wreath, then weighted it with a book for a couple hours and it was stuck on there forever!  And here you go, my completed fall wreath!

Tuesday, May 27, 2014

DIY Invitations, thank you cards, save the dates, and programs...

One thing that I wanted to do for the wedding was make sure that we keep the cost down.  One of the ways we did that was designing all of our invitations, save the dates, programs, etc on Vista Print. It started with our save the dates and then just snowballed from there.

Initially, Joe really wanted magnet save the dates but we wanted to keep it low cost.  On Vista Print, you are able to design your own image and uploaded onto a magnet.  After looking through several websites, I found two save the dates I loved, and wanted to combine.  I took the ideas and went onto PowerPoint and played around with different designs.  After getting some designs down, Joe had his feedback and we were good to go!  Below you will see the image that we ended up downloading for our save the dates.  There are so many coupons online for Vista Print so we always took full advantage of them and normally got 50% off the regular price and free shipping!

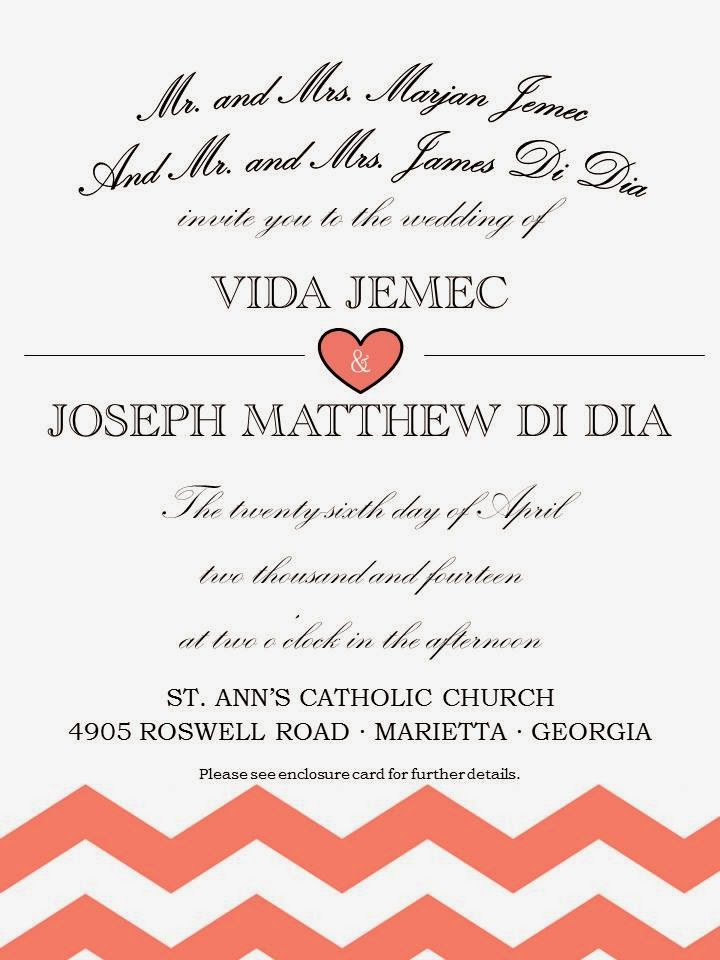
After the save the dates came the information that needed to get printed for the wedding.  We started with our invitations.  We didn't want to do anything too crazy and keep it simple.  We had entertained a lot of ideas but ended up deciding to design our own.  My sister had bought blank invitations from Michaels for her wedding and printed them, but we didn't have much luck finding any that were reasonably priced and to our liking, so I got to designing the invitations.  As you will see, it got to be simple to design the remainder of the pieces since I standardized on the fonts for the invitations, and the chevron pattern would be the design on all of them.  Below you will see our final invitation and enclosure card designs.  The back of each simply had the coral chevron pattern on the same portion as the front of the card.
Invitations were 6" by 9"
Enclosure card was post card sized
Next to design was the program.  Since the invitations and the save the dates had the chevron, we kept that pattern and similar font for the programs.  We were having a catholic wedding so we you will see that our programs follow the catholic format.  We did not do a full mass since we had a deacon marrying us, so it was a shorter Catholic ceremony. The dimensions for the programs was 4"x8.
 A very special thing we also ended up doing on Vista Print was something that we were doing for our wedding.  We were using wine bottles as our center pieces and we wanted to use a unique idea (explanation in a different post).  Below are cards that we designed for our guests to write notes on!  They were post card sized.

Last, but certainly not least, were our thank you cards.  We also did these post card sized, and kept them simple so we had a lot of room to write!   The back of the thank you kept the image of the chevron pattern as well.  Enjoy :)

So there it is, all of our printed artwork that came from Vista Print!  They are so easy to work with and even shipped us replacements after we found a typo after submitting the cards to print.  They come with envelopes with is nice as well!  Let me know if you have any questions.